Monday, November 29, 2010

Composting for Great Soil

Across the planet earth an amazing process is continuously taking place. Plant parts and animal leavings rot or decompose with the help of fungi, bacteria, and other microorganisms. Earthworms and an assortment of insects do their part digesting and mixing the plant and animal matter together. The result is a marvelous, rich, and crumbly layer of organic matter we call compost, which is nature's gift to the gardener.


Benefits of Compost

Compost encourages earthworms and other beneficial organisms whose activities help plants grow strong and healthy. It provides nutrients and improves the soil. Wet clay soils drain better and sandy soils hold more moisture if amended with compost. A compost pile keeps organic matter handy for garden use and, as an added advantage, keeps the material from filling up overburdened landfills.

How to Make Compost

Start with a layer of chopped leaves, grass clippings and kitchen waste like banana peels, eggshells, old lettuce leaves, apple cores, coffee grounds, and whatever else is available. Keep adding materials until you have a six-inch layer, and then cover it with three to six inches of soil, manure, or finished compost.

Alternate layers of organic matter and layers of soil or manure until the pile is about three feet tall. A pile that is three feet tall by three feet square will generate enough heat during decomposition to sterilize the compost. This makes it useful as a potting soil, topdressing for lawns, or soil-improving additive.

Your compost pile may benefit from a compost activator. Activators get the pile working, and speed the process. Alfalfa meal, barnyard manure, bone meal, cottonseed meal, blood meal, and good rich compost from a finished pile are all good activators. Each time you add a layer to your pile, sprinkle on some activator and water well.

Sunday, November 28, 2010

Sunday, November 21, 2010

Sunday, October 31, 2010

Wednesday, October 27, 2010

Asparagus

Asparagus grows in most any soil as long as it has good internal drainage. Asparagus roots do not like waterlogged soils that will lead to root rot. Till to a 6 inch depth before planting.

Buy one-year-old, healthy, disease-free crowns from a reputable crown grower. A crown is the root system of a one-year-old asparagus plant that is grown from seed. Each crown can produce 1/2 lb. of spears per year when fully established.

Asparagus is a long-lived perennial vegetable crop that is enjoyed by many gardeners. It can be productive for 15 or more years if given proper care.

Asparagus can be planted throughout the northeast from mid-April to late May after the soil has warmed up to about 50 degrees F. There is no advantage to planting the crowns in cold, wet soils. They will not grow until the soil warms and there is danger of the plants being more susceptible to Fusarium crown rot if crowns are exposed to cold, wet soils over a prolonged period. Plant the asparagus at either the west or north side of the garden so that it will not shade the other vegetables and will not be injured when the rest of the garden is tilled.

Dig a furrow no deeper than 5 to 6 inches. Research has shown that the deeper asparagus crowns are planted, the more the total yield is reduced. Apply about 1 lb. of 0-46-0 (triple superphosphate) or 2 lbs. of 0-20-0 (superphosphate) fertilizer per 50 feet of row in the bottom of the furrow before planting. This will make phosphorus immediately available to the crowns. Omitting this procedure will result in decreased yields and the spear production will not be as vigorous.

Toss the crowns into the furrow on top of the fertilizer. The fertilizer will not burn the crowns, and the plants will grow regardless of how they land so don't bother to spread the roots. Space the crowns 1-1/2 feet apart in the row. If more than one row is planted, space the rows five feet apart from center to center. Wide between-row spacing is necessary because the vigorously growing fern will fill in the space quickly. Wide spacing also promotes rapid drying of the fern to help prevent the onset of fungus diseases.

After planting, back fill the furrow to its original soil level. It isn't necessary to gradually cover the crowns with a few inches of soil until the furrow is filled in. However, do not compact the soil over the newly filled furrow or the emergence of the asparagus will be severely reduced. Spears should emerge within one week in moist soils.

Do not harvest the asparagus during the planting year. Spears will be produced from expanded buds on the crown. As the spears elongate and reach a height of about 8 to 9 inches, the tips will open. The spear will become woody to support the small branch lets that become ferns. The ferns produce food for the plant and then move it down to the crown for next year's spear production.

Asparagus is very drought tolerant and can usually grow without supplemental watering because it seeks moisture deep in the soil. However, if rainfall is insufficient when planting or afterwards, it is beneficial to irrigate the crowns. Otherwise the plants will become stressed and growth will be slowed.

Harvesting

Harvest asparagus by snapping 7 to 9 inch spears with tight tips. There is no need to cut asparagus below the soil with a knife. This may injure other buds on the crown that will send up new spears. The small stub that is left in the soil after snapping dries up and disintegrates. A new spear does not come up at the same spot, but comes up from another bud that enlarges on another part of the crown.

As the tips of the spears start to loosen (known as "ferning out"), fiber begins to develop at the base of the spears, causing them to become tough. The diameter of the spear has no bearing on its toughness. When harvesting, the asparagus patch should be picked clean, never allowing any spears to fern out, as this gives asparagus beetles an excellent site to lay their eggs.

The year after planting, asparagus can be harvested several times throughout a three-week period, depending on air temperatures. Research shows there is no need to wait two years after planting before harvesting. In fact, harvesting the year after planting will stimulate more bud production on the crown and provide greater yields in future years, as compared with waiting two years before harvesting.

Asparagus spears will start to emerge when the soil temperature reaches 50 degrees F. After this, growth of asparagus is dependent on air temperature. Early in the season, 7 to 9 inch spears might be harvested every 2 to 4 days. As air temperatures increase, harvesting frequencies will increase to once or twice per day, harvesting 5 to 7 inch spears before the tips start to fern out and lose quality. The second year after planting, the length of harvest can increase to about 4 to 6 weeks. The third year after planting and thereafter, harvesting can continue for 6 to 8 weeks. Since the length of harvest season will vary from year-to-year depending on air temperature, stop the harvest when the diameter of 3/4 of the spears becomes small (less than 3/8 inches). Experience gained by growing the crop will make it easier for the gardener to know when to discontinue the harvest.

When harvest is finished, snap all the spears off at ground level. Apply 1/2 lb. of ammonium nitrate fertilizer per 50 feet of row. At this time, a home garden formulation of glyph sate non-selective herbicide (such as Roundup) can be sprayed on the asparagus patch. This will kill any existing weeds. New spears will then emerge; fern out, and provide a large canopy to cover the space between the rows. Once a dense fern canopy is formed, weed growth will be shaded out.

Storage

Asparagus is very perishable and should be harvested in the morning when air temperatures are cool. After picking, immerse the spears in ice-cold water to remove the heat; then drain the water and place the spears in plastic bags. Store in the refrigerator at 38 to 40 degrees F. Asparagus will keep for 1 to 2 weeks with little loss of quality.

Sunday, October 17, 2010

Container Gardening Tips

I'm a firm believer in container gardening. This type of gardening has many advantages, first you can control the amount of water the plant needs, and if the environment get bad like a storm you can move the plants to a safe place until the storm or whatever passes by. But the best part is you can be right there to watch them grow and develop. Now you want to make sure that your container is deep enough to contain the roots so you want to have enough room for the plant to grow. A good rule of thumb is the roots will grow down about half as far as the plant grows above ground. Another thing is please make sure your containers are clean and free of cleaning products. This will have a profound effect on how your plants do over the season because of the residual effect of cleaners.

I find it useful to use 5 gallon containers to grow most of my plants. This way you know the roots have plenty of room to grow. Be sure to put a layer of gravel on the bottom about one inch high and put about 8 to 10 holes in the bottom of the bucket to assure good drainage for the plant. And use the best soil you can get. I have found that a rich dark brown soil with some moisture makes the best medium for most plants. Before you put the gravel in the bucket make sure you rinse and clean the gravel to make sure it is free of contaminants.

Tuesday, October 12, 2010

Wednesday, September 29, 2010

Thursday, September 16, 2010

Composting

Across the planet earth an amazing process is continuously taking place. Plant parts and animal leavings rot or decompose with the help of fungi, bacteria, and other microorganisms. Earthworms and an assortment of insects do their part digesting and mixing the plant and animal matter together. The result is a marvelous, rich, and crumbly layer of organic matter we call compost, which is nature's gift to the gardener.


Benefits of Compost


Compost encourages earthworms and other beneficial organisms whose activities help plants grow strong and healthy. It provides nutrients and improves the soil. Wet clay soils drain better and sandy soils hold more moisture if amended with compost. A compost pile keeps organic matter handy for garden use and, as an added advantage, keeps the material from filling up overburdened landfills.


How to Make Compost

Start with a layer of chopped leaves, grass clippings and kitchen waste like banana peels, eggshells, old lettuce leaves, apple cores, coffee grounds, and whatever else is available. Keep adding materials until you have a six-inch layer, and then cover it with three to six inches of soil, manure, or finished compost.


Alternate layers of organic matter and layers of soil or manure until the pile is about three feet tall. A pile that is three feet tall by three feet square will generate enough heat during decomposition to sterilize the compost. This makes it useful as a potting soil, topdressing for lawns, or soil-improving additive.


Your compost pile may benefit from a compost activator. Activators get the pile working, and speed the process. Alfalfa meal, barnyard manure, bone meal, cottonseed meal, blood meal, and good rich compost from a finished pile are all good activators. Each time you add a layer to your pile, sprinkle on some activator and water well.

Saturday, September 11, 2010

Saving Pepper Seeds


You want to start with a fully grown, ripe bell pepper. Allowing the pepper to grow to maturity will help ensure your pepper has healthy, robust seeds, resulting in a higher germination rate when planted.


Using a sharp knife, carefully cut the pepper down the middle from top to bottom. This will leave you with two halves, both containing plenty of seed.

Now take the spoon and scoop the seeds out onto a paper towel. Try to separate them from each other as much as you can. Let them dry out for a few days in a cool, dry area.

To store your seeds for planting next year, place the dried out pepper seeds in a paper envelope. It is optimal to then place the envelope in the refrigerator or freezer to maximize their shelf life.

Sunday, September 5, 2010

Saving Tomato Seeds

This is a really simple process. Here's how you save tomato seeds:
1. Choose a ripe, perfect tomato.
2. Cut it across the center of the fruit.
3. Squeeze the seeds, gel, and juice out into a small cup or jar.
4. Cover the seed gunk with two to three inches of water.
5. Label your container so you know which variety of tomato you saved seeds from.
6. Set the labeled jar in an out-of-the way spot and wait.
7. After about three days, white mold will start to form on the surface of the water. This means that the gelatinous coating on the seeds has dissolved.
8. Once you see the white mold, pour off the mold, the water, and any seeds that are floating (floating seeds are bad - they wouldn't have germinated.) You want all of those seeds sitting at the bottom of the cup.
9. After you've poured the mold and bad seeds off, drain your seeds in a fine mesh strainer and rinse under running water. It's not a bad idea to move the seeds around with your fingers to remove any extra gel that may be clinging to them.
10. Dump your rinsed seeds onto a paper plate that has been labeled with the variety name. (Yes, paper plates. Not ceramic. You need something that will wick the water away from the seeds so they dry fast and don't get moldy.)
11. Make sure your seeds are in a single layer on the plate, and set it aside a few days so the seeds can completely dry.
12. Once they're dry, put them in a labeled envelope, baggie, or other container and store in a cool, dry spot. I like to keep mine in the fridge.
Tomato seeds will keep well and germinate reliably for up to ten years if stored properly.
So, there you have it. Save seeds from your favorite tomatoes, and grow them every year. You'll be helping to protect genetic diversity in our food supply and keep some great heirloom tomatoes growing. And you'll be rewarded each and every time you enjoy a ripe, juicy tomato straight from your own garden.

Saturday, September 4, 2010

Saving Onion Seeds

Did you know that you can save the seeds from onions in your garden to plant next year? It's true. Once the garden onion matures and grows an attractive white flower resembling a ball, it's easy to save lots of onion seeds for next year's garden. Saving onion seeds saves money and gives you a feeling of accomplishment.

Onions are rich in vitamins B6, B1, K, C, folic acid, chromium, biotin, and fiber. It only makes sense to add this nutritional vegetable to the summer garden and to also save the seeds. I'm a nut about saving seeds from vegetables in our garden each year. It's so easy to save seeds from onions, as well as other garden vegetables. In saving onion seeds, you'll have onion seeds to give your gardener friends and you can also give onion seeds to people who desire a garden, but don't have the money to get one started.


Here's all you need to do to save onion seeds:

Harvest your onions in the usual way, once they're ready to be picked. By the way, onions are ready to harvest when you can see the top of the onion peeking out of the ground. Save one onion, do not pull it up, leave it in the ground for the onion to turn to seed. How do you know when an onion has turned to seed? A beautiful, round white flower will emerge from the onion. These flowers can get quite tall and attractive, but, like most things in life, the beauty of the flower will soon fade. When the onion flower looks as if it's seen better days, cut the flower, along with a little of the stem, from the onion.

I stumbled upon the next step to save onion seeds by accident. Get a mason jar and put the onion flower inside. If you don't have a mason jar, a glass jar will do fine. Leave the onion flower alone for a couple of weeks. The onion flower will dry out and open up, releasing the tiny black onion seeds from the flower. If you have a band and lid for your mason jar, put on the lid and just shake the jar to encourage more seeds to release from the flower. Toss the spent onion flower in the compost bin, and there are your onion seeds for next year's garden.

Thursday, August 26, 2010

Friday, August 20, 2010

How To Prepare For An Unthinkable Crisis!

There is still time for you to prepare, but you have to start learning how to make your own survival foods as soon as humanly possible. The best way to do it is to get the inside scoop on how to do it right. Fortunately, there is a way to get twenty years worth of food storage secrets crammed into two DVD's.

This new food storage system is called Food Storage Secrets. You do not need a lot of expensive equipment to store foods for a crisis using the methods taught here. Even better, Food Storage Secrets pays for itself quickly as you begin to put away garden produce or even meats that you buy on sale. For most folks it's simply the biggest bargain of their lives. You can finally become self-sufficient and any extra money saved in food expense goes right back to your pocket. Frankly, at the end of the day, Food Storage Secrets actually makes you money!

What's more, the videos take you by the hand, step by step, through the entire process of "putting away" almost any food you can think of. It's very much like having a food storage professional right there with you every step of the way.

Tuesday, August 10, 2010

Sunday, August 8, 2010

Seed Starting


Starting seeds is actually an easy process, but success only comes through many years of trial and error. The obvious advantages are the cost savings and the variety as opposed to purchasing seedlings at the garden center.


Most vegetable and annual flower seeds need to be started 6-8 weeks prior to your last expected frost. The exact timing can be found on the seed packets, but 6 weeks is usually a good rule of thumb. Never sow seeds deeper than twice their diameter. For small seeds, place them on the surface of the growing medium, and then lightly sprinkle the mix over the seed until it is barely covered. Water from the bottom to avoid disrupting the seed germination process.


Seedlings need to be in simulated sunshine for at least 14 hours per day. They also need 8 hours of dormancy for good growth. You either need to invest in fluorescent bulbs called grow-lights which are as close to natural light as anything sold on the market, or substitute these with less expensive bulbs. By using one cool and one warm white fluorescent in combination, you will achieve the same effect.


If given the correct conditions, namely adequate moisture, strong light, and healthy soil, the seeds will germinate and grow to maturity with few or any problems. I grow my seedlings in seed trays with individual cell packs. After sowing the seeds, I cover them with a pre-fitted plastic dome. This is critical to keep the soil moist and the humidity high. But once the first seedlings sprout, it is important to remove the cover to avoid damping-off disease. This is a fatal fungus disease which only attacks young seedlings, and is caused by inadequate air circulation and non-sterile soil. That is why I advise all those who start seeds indoors to only use sterile, soilless mixes composed of vermiculite, perlite, and sphagnum moss. These mixes can be purchased at any reputable garden center.


Once the seedlings develop their second set of leaves, you can begin supplementing the plants with a diluted solution of fertilizer. Since you want to keep the nitrogen and salt levels low at this stage of growth, I highly recommend staying away from the chemical mixes. Rather, use a seaweed/fish emulsion formula at ¼ the recommended level. This will help the plants’ development and also help ward off disease. You can purchase these organic formulas at most garden centers or through online websites.

Wednesday, August 4, 2010

I love Green Onions

Growing green onions is fun and very good for your health. When I was growing up and my grandfather show me that onions are a great part of our diet. It has fiber and nutrients that are essential to our natural well being. I remember as a kid my grandfather would make bacon and eggs for breakfast and have sliced tomatoes with green onions. He ate these most every day and he was a very healthy man. But I always got caught up in his enthusiasm to grow his garden. Growing green onions in your garden is not only fun but it is beneficial to your health, and best of all it enhances the flavor of most foods.

Sunday, August 1, 2010

Friday, July 30, 2010

Monday, July 26, 2010

Carrot Growing

For best carrots, soil should be loose textured and cultivated very deep. If you cannot cultivate very deep use short rooted types of seed. After germination, thin seedlings well. Sometimes these seedlings can be very sweet to the taste. Fertilize when foliage is 6 to 8 inches high. Harvest when carrots are about the size of your finger, up to about 2 inches in diameter.

Saturday, July 24, 2010


"Bean, White Half Runner Bush 1 Pkt. (1/2 lb.)"


"HEIRLOOM. Plants yield early and need no support. One packet has 2 oz. of seed unless noted, and will sow a row of about 20 ft; one pound sows about 160 ft. Our seed is not treated. White Half Runner. 60 days. Heavy yields of tender green pods, 4? inches long with white seeds and sweet flavor. Sun. "

Tuesday, July 20, 2010

Plan your Garden for next year

Give some thought to the size and location of your garden. Whatever your choices are, it’s wise to make them ahead of time. Plan for paths where you want to walk. Consider the type of plants you want, the conditions under which they thrive, and place your beds where the best combination of light, shade, moisture and drainage. Choose the right plant for each location.


The amount of shade cast by each plant in your garden should be considered when you plan your garden. Trees are most versatile, permitting plenty of light during the cool weather of early spring and fall, and providing shade in the summer. Evergreen trees and shrubs will provide year-round shade.

Low walls and evergreen hedges provide a pattern of part day shade and part day sun, except to the south side where sun falls all day. Buildings and high walls are opaque to light, providing dense shade to the north and very hot, bright conditions to the south. A building may provide protection for the tender plants in winter.

Remember the sun rises about 30 degrees higher in summer than winter. Observe how light falls in your yard over the course of a year, and plan your garden area to use this to your advantage in each season.

Friday, July 16, 2010

Saving Seeds

When acquiring seed to grow vegetables make sure you buy Heirloom seeds. Do not buy hybrid seeds because you cannot save these seeds. Once you grow them they will not reproduce. Heirlooms seed are the best because they are handed down from generation to generation with the same elements that helped our grandparents survive with a healthy diet and without all these problems we have today with our health. It’s time to get back to basics before it is too late. Gather seed even if you do not garden, In the near future you may need this seed to live on because it will keep for a few years.

Thursday, July 15, 2010

Sunday, July 11, 2010

Canning for Survival

In North America, home canning is usually done in Mason jars, which have thicker walls than single-use commercial glass jars. Unless the food being preserved has a high acid (pH <4.6), salt or sugar content (resulting in water availability <0.85), such as pickles or jellies, the filled jars are also processed under pressure in a canner, a specialized type of pressure cooker. Ordinary pressure cookers are not recommended for canning as their smaller size and the reduced thickness of the cooker wall will not allow for the correct building up and reducing time of pressure, which is factored into the overall processing time and therefore will not destroy all the harmful microorganisms.[1] The goal in using a pressure canner is to achieve a "botulinum cook" of 121°C for 3 minutes, throughout the entire volume of canned product. Canners often incorporate racks to hold Mason jars, and pressure canners are capable of achieving the elevated temperatures needed to prevent spoilage.

The most common configuration is a Mason jar with a flat lid and screw ring. The lid is generally made of plated or painted steel, with an elastomeric washer or gasket bonded to the underside of the rim. The lid also incorporates a slightly dimpled shape, which acts as an indicator of the vacuum (or lack thereof) inside a sealed jar. The ring threads onto the top of the jar over the lid to hold it in place while the jar cools after processing; the ring can be removed once a vacuum has been established in the jar. Jars are commonly in either pint or quart capacities, with two opening diameters, known as "standard" and "wide mouth".

When a jar has cooled and is properly sealed, pressing the dimple on the lid will not make any sound. An improperly sealed jar will allow the dimple to move up and down, sometimes making a popping noise. Lack of this noise does not necessarily indicate that the food in the jar is properly preserved. Typically, during the cooling process, a properly sealed lid will pop once as the pressure inside the jar is reduced enough that atmospheric pressure pushes the lid inward.

Older variations had a ceramic seal inside a one-piece zinc lid. Other methods, especially for jams and jellies, may use a layer of hot paraffin wax poured directly over the top of the food to seal it from air, thus reducing growth of aerobic microorganisms like mold.

While it is possible to safely preserve many kinds of foodstuffs, home canning can expose consumers to botulism and other kinds of food poisoning if done incorrectly. Because of the high risk of illness or death associated with improper canning techniques, the United States Department of Agriculture (USDA) considers it critical that consumers who intend to can at home obtain proper and current information from a reliable source.[2] At the basis of these recommendations is the balance between bringing the food to a high enough temperature for a long enough time that spoilage and disease-producing microorganisms are killed, while not heating the food so much that it loses nutritive value or palatability.

To learn more Click Here

Tuesday, July 6, 2010

Try Growing Spinach this year

When to Plant
The first planting can be made as soon as the soil is prepared in the spring. If the soil was prepared in the fall, seeds can be broadcast over frozen ground or snow cover in late winter and they will germinate as the soil thaws. Plant successive crops for several weeks after the initial sowing to keep the harvest going until hot weather. Seed spinach again in late summer for fall and early winter harvest. Chill seeds for summer or fall plantings in the refrigerator for 1 or 2 weeks before planting. In southern locations, immature spinach seedlings survive over winter on well-drained soils and resume growth in spring for early harvest. With mulch, borderline gardeners should be able to coax seedlings through the winter for an early spring harvest. Spinach can be grown in hotbeds, sunrooms or protected cold frames for winter salads.


Spacing & Depth
Sow 12 to 15 seeds per foot of row. Cover 1/2 inch deep. When the plants are one inch tall, thin to 2 to 4 inches apart. Closer spacing (no thinning) is satisfactory when the entire plants are to be harvested. The rows may be as close as 12 inches apart, depending upon the method used for keeping weeds down. In beds, plants may be thinned to stand 4 to 6 inches apart in all directions. Little cultivation is necessary.


Care
Spinach grows best with ample moisture and a fertile, well-drained soil. Under these conditions, no supplemental fertilizer is needed. If growth is slow or the plants are light green, side-dress with nitrogen fertilizer.


Harvesting
The plants may be harvested whenever the leaves are large enough to use (a rosette of at least five or six leaves). Late thinning may be harvested as whole plants and eaten. Cut the plants at or just below the soil surface. Spinach is of best quality if cut while young. Two or three separate seedlings of short rows can provide harvest over an extended period. Some gardeners prefer to pick the outer leaves when they are 3 inches long and allow the younger leaves to develop for later harvest. Harvest the entire remaining crop when seeds talk formation begins because leaves quickly deteriorate as flowering begins.

Tuesday, June 29, 2010

Growing Rhubarb


The planting area should be thoroughly weeded prior to planting. Rhubarb is generally purchased as crowns, rather than propagated from seed. Planting Rhubarb seeds is not recommended, except in extremely southern areas of the United States. In addition Rhubarb is generally not propagated from seed since seedlings are not always true to type. Quality nursery stock for starting new plantings is recommended; this is due to freedom from virus, crown rots, root rots and weeds.
Rhubarb crowns can be purchased from seed catalogs or a local nursery, garden center. Plant the crowns as soon as possible so they don’t dry out.
Rhubarb is normally planted as early as possible in the spring since growth begins when soil temperatures are still well below 50º F. Rhubarb can also be planted in the fall after dormancy has set in.
Plant with the crown bud 2 inches below the soil surface.
Space the roots 36 to 48 inches apart in rows approximately 4 feet apart. Work plenty of well-rotted manure or compost into the rhubarb bed before planting.
Since rhubarb is a perennial, it should be planted to one side or at the end of the garden so as not to interfere with planting and growing annual vegetables. The rhubarb plant has bold ornamental texture and size, and some gardeners find it suitable to include in a perennial flower border.
Plant (or divide) rhubarb roots in early spring while the plants are still dormant, in well drained soil
Old roots may be dug and divided to make new plantings by cutting the roots into no more than eight pieces. Each piece must have at least one strong bud.

Cultivation
Cultivate shallowly as often as necessary to remove weeds. Apply a complete garden fertilizer in early spring before growth begins and side-dress with a high-nitrogen fertilizer in late June. Except in poorly drained sites, organic mulches help moderate soil temperature and moisture. Do not cover the crowns. Flower stalks should be cut off as soon as they appear.


Fertilizer
Lime - should be applied to maintain the soil pH in a range of 6.0 to 6.8...ranges as low as 5.0 are tolerable but not recommended.
Nitrogen - rhubarb has a high nitrogen requirement. Apply as necessary in the first year; otherwise apply nitrogen at bud break along with the phosphorus and potash. Apply a side dressing of nitrogen after harvest
Fertilize with a handful of a 5-10-10 fertilizer in the spring. A modest midsummer application will also benefit these vigorous plants.

Harvest

Do not harvest rhubarb during the first year of planting. Newly set plants need all their foliage to build a strong root system. Stalks may be harvested for 1 or 2 weeks during the second year and for 8 to 10 weeks (a full harvest season) during the third and subsequent years. Harvest in the fall only when the plants are to be discarded the next season.
If seed stalks and flowers develop during the spring and summer, cut them from the base of the plant as soon as they appear and discard them. Rhubarb is an extremely hardy plant. It is a beautiful garden plant, with huge extravagant, lush green leaves and pink or red stalks. Rhubarb is an ancient plant as well.


Varieties of Rhubarb

There are several different varieties of rhubarb grown all over the world and used in a variety of cooking preparations. One characteristic consistent with all rhubarb is the toxicity of the leaves and roots. The rhubarb leaves contain high amounts of oxalic acid, a toxic and potentially deadly poison. Only the stems are edible.
Victoria Red Rhubarb -Perennial - Easy to grow one of the largest and most productive varieties
Rhubarb Cherry Red This winter-hardy variety loves cold weather! Rich red through and through, this heavy producer is juicy, tender, and sweet. Cherry Red is winter-hardy rhubarb that thrives in cold weather. Perfect for Northern growers.
Valentine Rhubarb Loved for its hardiness, delicious flavor, thick flesh and fine grain
Victoria Rhubarb Easy-to-grow rhubarb variety
Bastard Rhubarb
Chinese rhubarb
English Rhubarb
European Wild Rhubarb
Garden Rhubarb
Himalayan rhubarb
Indian rhubarb
Ornamental Rhubarb
Sweet Round-leaved Dock
Wine Plant

Sunday, June 27, 2010

The many Advantages of raised bed gardening


First, there are advantages for your garden:

Perhaps the most important advantage is greatly reduced soil compacting. Plant roots need air. In an ordinary garden, you can’t avoid stepping in the garden bed occasionally when doing your everyday gardening. A properly designed raised bed garden allows you to do all you’re gardening from the garden path.
Plants can be spaced a little closer together in a raised bed because you don’t need places to step. This increases productivity per square foot of bed and reduces weeding when the plants begin to mature.
Note: Avoid the temptation to crowd your plants. You will still want to use generous plant spacing because your plants will grow much larger in raised beds.

Raised beds tend to drain away excess moisture better than ordinary garden beds. This is another advantage that helps the plant roots to breath. In areas that have saturated soil like Florida and many areas of the South, raised beds may be the only way you can grow many types of plants.
Soil conditions and types can be controlled more efficiently in a raised bed and they can be varied easily from bed to bed. Raised beds are the answer when topsoil is thin.
Water, fertilizer, compost, mulch, etc. can be applied more carefully because they only need to be applied to the garden beds.
Various studies have shown that raised garden beds produce 1.4 to 2 times as much vegetables and flowers per square foot as ordinary beds, due mainly to the above advantages. You can have a smaller and more manageable garden that produces more goodies for your table.

Friday, June 25, 2010

Beware Of Rising Food Cost


Skyrocketing food prices are hitting pocketbooks worldwide. The world’s poorest countries which have the highest population bases are at risk the most as core food supplies become scarce. Worldwide grain supplies are dropping precipitously. Exporting nations are now themselves running out of grain.

As a result, hunger is spreading worldwide. Already, several African nations have had citizens killed in food riots. There is talk that the government in Bangladesh could be toppled over soaring food prices. Food-related tensions and unrest are breaking out in Central Asia, Southeast Asia, and South America. Armed soldiers now stand watch over rice distribution in more and more countries. Just a few miles to the South, food riots have broken out in Mexico and Haiti. Estimates are that 33 nations are at risk of conflict and social unrest because of food shortages.

That's a lot of suffering. And, Americans who know their history understand all to well, suffering tends to bring out the ugly side in human nature. Right now, Americans just change channels when they see others starving on television. But it seems America could be next. The dollar is quickly losing value and the U.S. is more dependent on foreign food production than ever. Already grocery bills are rising faster than incomes. Wheat, corn, soybeans, bread, apples, beef, chicken, eggs, and milk: prices for these items are shooting up by double-digit percentages. Coupled with energy prices pushing skyward, more and more Americans are feeling the pinch which now includes food shortages. Many experts think we could be approaching the greatest disaster in the country's history. Many Americans are starting to prepare.

To learn how to preserve your own food (cheap) Click Here

Tuesday, June 22, 2010

Growing Squash


Summer and winter squash are some of the most popular vegetables in the home garden. Summer squash can be eaten raw in salads, stir-fried, steamed, or cooked in various dishes. Winter squash can be baked, steamed, or boiled.
Summer squashes are large, bushy plants. The fruit of summer squash are harvested when they are immature and have soft skins. Fruit can be stored for 1 to 2 weeks. There are several types of summer squash. These include zucchini (cylindrical, club-shaped fruit), crookneck (long, tapered fruit with curved necks), straight neck (bottle-shaped fruit with straight necks), and scallop (flattened, roundish fruit with scalloped edges).
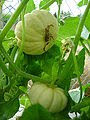
Most winter squashes are large, vining plants. (Several semi-bush varieties are available to individuals with small gardens.) Fruit are harvested when they are mature and have hard rinds. Winter squash fruit can be stored in a cool, dry location for 1 to 6 months. Various sizes, shapes, and colors of winter squash are available. These include acorn, buttercup, butternut, and hubbard.

Suggested Varieties
Summer Squash Winter Squash
Dixie - yellow crookneck Blue Hubbard
Elite - zucchini Burgess Buttercup
Goldfinger - golden zucchini Butternut Supreme
Jaguar - zucchini Sweet Mama - buttercup
Seneca Butterbar - yellow straightneck Table Ace - acorn
Spineless Beauty - zucchini Table Queen - acorn
Sunburst - yellow patty pan (scallop) Vegetable Spaghetti

Planting
Summer and winter squash perform best in fertile, well-drained soils containing high levels of organic matter. They also require full sun. Organic matter levels can be increased by incorporating well-rotted manure or compost into the soil. If a soil test has not been conducted, apply and incorporate 1 to 2 pounds of an all-purpose garden fertilizer, such as 10-10-10, per 100 square feet prior to planting.
Summer and winter squash are commonly planted in hills. Sow 4 to 5 seeds per hill at a depth of 1 inch in mid-May in central Iowa. Thin to 2 to 3 vigorous, well-spaced plants per hill when seedlings have 1 or 2 true leaves. The last practical planting date for summer squash is July 20. Winter squash must be planted by June 10.
For an early crop, start plants indoors 3 to 4 weeks prior to the anticipated outdoor planting date. Since squash seedlings don't tolerate root disturbances during transplanting, start seeds in peat pots, peat pellets (Jiffy 7's), or other plantable containers. Sow 3 to 4 seeds per container. Later, remove all but 2 seedlings. Harden the plants outdoors for a few days in a protected location prior to planting to lessen transplant stress.
Hills and rows of summer squash should be 3 to 4 feet apart. Hills of winter squash should be spaced 4 to 5 feet apart with 5 to 7 feet between rows.

Care
Control weeds with frequent, shallow cultivation and hand pulling. Water plants once a week during dry weather.
Squash bugs and squash vine borers can be serious pests. Squash bugs have piercing-sucking mouthparts. Heavy feeding causes entire leaves to wilt, turn brown, and die. Several methods can be used to control squash bugs in the garden. Adults and brick red egg masses on the undersides of leaves can be removed by hand. Adults can also be trapped under boards or shingles placed under the plants. Turn the objects over daily and collect and destroy the hiding squash bugs. Small, immature squash bugs (nymphs) can be controlled with insecticides, such as carbaryl (Sevin). In fall, remove and destroy plant debris to deprive squash bugs of overwintering sites.
Squash vine borer larvae bore into squash stems near ground level. Larvae feeding within the vines eventually cause the plants to wilt and die. Squash vine borers can be controlled with applications of insecticides (rotenone, permethrin, or marathon) at regular intervals beginning in mid-June. Apply the insecticide to the base of the vines. After the final harvest, remove and destroy the plant debris. Rototilling in fall or spring may destroy overwintering pupae in the soil.

Harvest
Harvest long-fruited summer squash varieties when they are about 2 inches in diameter and 6 to 12 inches long. Scalloped types are best when 3 to 5 inches in diameter. Fruit should have soft skins (rinds) that are easy to puncture with a fingernail. Seeds should be soft and edible.
Mature winter squash have very hard skins that can't be punctured with the thumbnail. Additionally, mature winter squash have dull-looking surfaces. When harvesting fruit, leave a 1-inch stem on winter squash. Store the fruit in a cool, dry, well-ventilated location.

Monday, June 21, 2010

Why You Should Grow Vegetables


Starting a vegetable garden at home is an easy way to save money, that $2 tomato plant can easily provide you with 10 pounds of fruits over the course of a season.

It also gives you the pleasure of savoring a delicious, sun-warmed tomato fresh from the garden. In almost every case, the flavor and texture of varieties you can grow far exceed the best grocery store produce.

Plus, growing vegetables can be fun. It's a great way to spend time with children or have a place to get away and spend time outdoors in the sun.

Growing vegetables is probably easier than you think. If you plan it right, you can enjoy a beautiful garden full of the fruits of your labor -- without having to spend hours and hours tending it.

Wednesday, June 2, 2010

Wednesday, May 19, 2010

Growing Asparagus


Asparagus grows in most any soil as long as it has good internal drainage. Asparagus roots do not like waterlogged soils that will lead to root rot. Till to a 6 inch depth before planting.
Buy one-year-old, healthy, disease-free crowns from a reputable crown grower. A crown is the root system of a one-year-old asparagus plant that is grown from seed. Each crown can produce 1/2 lb. of spears per year when fully established.
Asparagus is a long-lived perennial vegetable crop that is enjoyed by many gardeners. It can be productive for 15 or more years if given proper care.
Asparagus can be planted throughout the northeast from mid-April to late May after the soil has warmed up to about 50 degrees F. There is no advantage to planting the crowns in cold, wet soils. They will not grow until the soil warms and there is danger of the plants being more susceptible to Fusarium crown rot if crowns are exposed to cold, wet soils over a prolonged period. Plant the asparagus at either the west or north side of the garden so that it will not shade the other vegetables and will not be injured when the rest of the garden is tilled.
Dig a furrow no deeper than 5 to 6 inches. Research has shown that the deeper asparagus crowns are planted, the more the total yield is reduced. Apply about 1 lb. of 0-46-0 (triple superphosphate) or 2 lbs. of 0-20-0 (superphosphate) fertilizer per 50 feet of row in the bottom of the furrow before planting. This will make phosphorus immediately available to the crowns. Omitting this procedure will result in decreased yields and the spear production will not be as vigorous.
Toss the crowns into the furrow on top of the fertilizer. The fertilizer will not burn the crowns, and the plants will grow regardless of how they land so don't bother to spread the roots. Space the crowns 1-1/2 feet apart in the row. If more than one row is planted, space the rows five feet apart from center to center. Wide between-row spacing is necessary because the vigorously growing fern will fill in the space quickly. Wide spacing also promotes rapid drying of the fern to help prevent the onset of fungus diseases.
After planting, back fill the furrow to its original soil level. It isn't necessary to gradually cover the crowns with a few inches of soil until the furrow is filled in. However, do not compact the soil over the newly filled furrow or the emergence of the asparagus will be severely reduced. Spears should emerge within one week in moist soils.
Do not harvest the asparagus during the planting year. Spears will be produced from expanded buds on the crown. As the spears elongate and reach a height of about 8 to 9 inches, the tips will open. The spear will become woody to support the small branch lets that become ferns. The ferns produce food for the plant and then move it down to the crown for next year's spear production.
Asparagus is very drought tolerant and can usually grow without supplemental watering because it seeks moisture deep in the soil. However, if rainfall is insufficient when planting or afterwards, it is beneficial to irrigate the crowns. Otherwise the plants will become stressed and growth will be slowed.

Wednesday, May 12, 2010

Survival Gardening


Gardening today is the same as it was 100 years ago. You till the soil then you plant. What do you plant? In some cases you must save seed from the past season. This is Survival Gardening.

Hello, my name is Ron, welcome. This article is about gardening to survive. I hope to teach you on some of the ways to get food and prepare for emergencies that could last for years.

Gardening yourself is the best way to acquire fresh vegetables, because you know how they were grown and you determine if they are grown organically or if you use pesticides to control insects.

Now in a survival situation you may not have the luxury of the normal ways of gardening. So you must make do with what you have. The first thing you need is seed. Remember if you garden be sure to let some of your plants go to seed, or fully mature to a dried up state. And store them in a cool dry place.

Half of surviving is being prepared; if you don’t have the tools to help you survive you will perish. So do what you need to do for your own comfort level.

Now if you actually want to have a survival garden in the woods it must blend in with the landscape, no matter where you are at it must blend in so it will not be stolen. Some things to do are cover the soil with leaves or some type of cover to make them blend in. Now you have to remember exactly where they are at or you may walk right over them yourself. Also don't leave any trails to your garden and come in from a different direction every time you go there so you don't leave a trail.

You still want to plant this garden in a remote place where no one will find it. But you also want your garden to be close to where you are. So you can keep an eye on it, and keep it properly watered and also watch the health of your plants. Now make sure your garden gets plenty of sun, this is important for the growth and development of your garden. Make sure you plant this garden in a place where it drains well like on the side of a hill. If you plant it in a low lying area it may trap water and drown your plants. Or be washed away by running water that flows down hill. Just be careful where you plant.

These are just a few things to consider if you ever have to plant in the wild, But be sure to have seed handy even if you have to buy it from a seed company at least you will have seed to survive.

Sunday, May 2, 2010

Plan your Garden


Location
Give some thought to the size and location of your garden. Whatever your choices are, it’s wise to make them ahead of time. Plan for paths where you want to walk. Consider the type of plants you want, the conditions under which they thrive, and place your beds where the best combination of light, shade, moisture and drainage. Choose the right plant for each location.
The amount of shade cast by each plant in your garden should be considered when you plan your garden. Trees are most versatile, permitting plenty of light during the cool weather of early spring and fall, and providing shade in the summer. Evergreen trees and shrubs will provide year-round shade.
Low walls and evergreen hedges provide a pattern of part day shade and part day sun, except to the south side where sun falls all day. Buildings and high walls are opaque to light, providing dense shade to the north and very hot, bright conditions to the south. A building may provide protection for the tender plants in winter.
Remember the sun rises about 30 degrees higher in summer than winter. Observe how light falls in your yard over the course of a year, and plan your garden area to use this to your advantage in each season.

Sunday, April 25, 2010

Growing in Containers


You don't need a plot of land to grow fresh vegetables. Many vegetables lend themselves well to container gardening. With some thought to selecting bush or dwarf varieties, almost any vegetable can be adapted to growing in a pot. Vegetables that take up little space, such as carrots, radishes and lettuce, or crops that bear fruits over a long period of time, such as tomatoes and peppers, are perfect for container vegetable gardens.

What you can grow in a container vegetable garden is limited only by the size of the container and your imagination. How about a Summer Salad container? Plant a tomato, a cucumber and some parsley or chives all in a large (24-30") container. They grow well together and have the same water and sun requirements. By late summer they might not be very pretty, but they'll keep producing into the fall. This makes a great housewarming present, too.


Containers and Pots for Vegetable Gardens
Selecting Containers: Containers for your vegetable gardens can be almost anything: flower pots, pails, buckets, wire baskets, bushel baskets, wooden boxes, nursery flats, window planters, washtubs, strawberry pots, plastic bags, large food cans, or any number of other things.
Drainage: No matter what kind of container you choose for your vegetable garden, it should have holes at the base or in the bottom to permit drainage of excess water.

Color Considerations: You should be careful when using dark colored containers because they absorb heat which could possibly damage the plant roots. If you do use dark colored pots, try painting them a lighter color or shading just the container.

Size: The size of the container is important. For larger vegetables like tomatoes and eggplants, you should use a five gallon container for each plant. You can grow these plants in two gallon containers, however you need to give the plants considerably more attention.


Soil and Fertilizer
You can use soil in your container vegetable garden, but the synthetic mixes are much better. Peat-based mixes, containing peat and vermiculite, are excellent. They are relatively sterile and pH adjusted. They also allow the plants to get enough air and water. Mixing in one part compost to two parts planting mix will improve fertility.
Using a slow release or complete organic fertilizer at planting will keep your vegetables fed for the whole growing season.


Watering
Pots and containers always require more frequent watering than plants in the ground. As the season progresses and your plants mature, their root system will expand and require even more water. Don't wait until you see the plants wilting. Check your containers daily to judge the need for water.

Monday, April 12, 2010

Beans for your Garden


Man has cultivated edible beans for thousands of years. They are widely planted and useful for home gardens. Early varieties were tough and required string removal and long cooking to soften them. Before the late 19th century, most beans were raised for shelled, dried beans, and not for fresh green beans.

The snap bean originated in tropical regions of southern Mexico, Guatemala, Honduras, and Costa Rica. In the late 1800s, breeders began selective breeding for improved flavor and disease resistance. Calvin Keeney, the "father of the Stringless Bean" bred Burpee's Stringless Green Pod in 1898. It was the most popular variety until Tendergreen arrived in 1925. Bush Blue Lake, developed in 1962, was a major breakthrough in bean varieties. The Kentucky Wonder Pole Bean, introduced in 1877 by Ferry-Morse Seed Company and is still a very popular variety today.
Snap beans have tender, fleshy pods with little fiber. They may be green, yellow, or purple.

Common beans include the French or European beans that produce very narrow, sometimes pencil-thin, pods. Italians prefer the thicker, flatter Romano beans. Wax beans are long and narrow with yellow pods and a waxy appearance. Purple beans such as Royal Burgundy, add color to the garden but the pods change to green when boiled. They are produced both as ornamentals and as edible vegetables.
Ornamental beans like scarlet runner beans produce striking, bright red blooms followed by beans that are edible while young. Blue hyacinth beans produce deep lilac-blue flowers which produce maroon bean pods. Ornamental beans are usually planted for their attractive flowers rather than for consumption. They grow quickly up to beautifully cover fences, trellises and arbors.

Sunday, March 28, 2010

Containers for Vegetable Gardening


Nearly any type of container can be used for growing vegetable plants. Old wash tubs, wooden boxes or crates, gallon-sized coffee cans, and even five-gallon buckets can be implemented for growing crops as long as they provide adequate drainage.

Regardless of the type or size of your container, drainage is vital for successful growth and the overall health of vegetables. If the container you have chosen does not provide any outlets for drainage, you can easily drill a few holes within the bottom or lower sides. Placing gravel or small stones in the bottom of the container will help improve drainage as well. You may also consider raising the container an inch or two off the ground with blocks.

Depending on the crops you selected, the size of the container will vary. Most plants require containers that allow at least 6- to 8-inch depths for adequate rooting. Smaller sized containers, like coffee cans, are generally ideal for crops such as carrots, radishes, and herbs; use medium sized containers, such as five-gallon buckets, to grow tomatoes or peppers. For larger crops, such as vine growers, beans, and potatoes, you want to implement something more suitable to their needs, such as a large wash tub.

The spacing requirements for most vegetables are usually found on the seed packet or you can find them in gardening resource books. Once the seeds have sprouted, you can thin the plants to the desired number suitable to the container.


Fill containers with peat moss and a suitable potting mix. Compost or manure should be worked in to achieve healthier plant growth. Do not add more than the recommended amounts of fertilizer, however, since doing so can burn the plants.

Thursday, March 25, 2010

The Ultimate in Currency


There has been a lot in the news these days about the decline of the U.S. Dollar. Countries such as Russia and China have been pushing for a new world currency or a basket of currencies to replace the dollar as the worlds reserve currency.

Just this morning Brendan Murray of Bloomberg posted an article about this very problem. I'll quote a little from that article:


"President Barack Obama's effort to lead the world economic recovery by spending the U.S. out of its recession is undermining the dollar, triggering record commodities rallies as investors scour the globe for hard assets.

As threats of a financial meltdown fade, the currency is falling victim to an unprecedented budget deficit, near-zero interest rates and slow growth.

The dollar is down 10 percent against six trading partners' legal tender in Treasury Secretary Timothy Geithner's first eight-and-a-half months, the sharpest drop for a new occupant of that office since the Reagan administration's James Baker persuaded world leaders to boost the deutsche mark and yen by debasing the dollar in 1985."

So what does this mean to you? Simply put, your money isn't worth as much as it used to be.
It can be so frustrating to know that you can work very hard, save up some money, then wake up the next morning and find out you can't buy that much with it. In short, you are being robbed.

Many people are hedging the risk of inflation by buying gold, and that may be a good decision. But in the end, even gold requires that you exchange it for the things you really need, and you can't eat it.


Yes my friends the ultimate way to protect your family against economic turmoil is with Food Storage. If you store food and water you are storing security for your family.

Freeze Dried Food can store for longer than 30 years. So when you are making your plans for financial security, please remember that Food Storage is the ultimate currency.

For more information Click Here

Friday, March 19, 2010

You’re First Garden


Deciding What to Grow

It's best to start small with your first garden. Many gardeners get a little too excited at the beginning of the season and plant more than they need -- and end up with wasting food and feeling overwhelmed by their garden.

So first, take a look at how much your family will eat. Keep in mind that vegetables such as tomatoes, peppers, and squash keep providing throughout the season -- so you may not need many to serve your needs. Other vegetables, such as carrots, radishes, and corn produce only once. You may need to plant more of these.


Determining How Much Space You Need

Once you know what you want to plant, you can figure out how much space your garden will need.

Keep in mind that you don't need a large space to begin a vegetable garden. If you choose to grow in containers, you don't even need a yard -- a deck or balcony may provide plenty of space.

In fact, a well-tended 10-x-10-foot garden will usually produce more than a weed-filled or disease-ridden 25-x-50-foot bed.

Tuesday, March 9, 2010

Why you should Grow Vegetables


Starting a vegetable garden at home is an easy way to save money, that $2 tomato plant can easily provide you with 10 pounds of fruits over the course of a season.

It also gives you the pleasure of savoring a delicious, sun-warmed tomato fresh from the garden. In almost every case, the flavor and texture of varieties you can grow far exceed the best grocery store produce.

Plus, growing vegetables can be fun. It's a great way to spend time with children or have a place to get away and spend time outdoors in the sun.

Growing vegetables is probably easier than you think. If you plan it right, you can enjoy a beautiful garden full of the fruits of your labor -- without having to spend hours and hours tending it.

Sunday, February 21, 2010

Tomatoes, America’s Favorite


When planting tomatoes be sure and set the plants deeper in the soil than in the original container. Be sure and use mulch or black plastic ground cover to maintain even soil temperature and moisture. A light side dressing of fertilizer may be applied when blossoms first appear. Also while plants are small you should put a tomato cage or some other type of support, so when the plant is mature it will not fall over from the weight of the tomatoes. Soil should be well limed before planting, this and even moisture levels will help prevent Blossom-End Rot. Select tomato varieties that are resistant to disease. Harvest tomatoes when red and juicy. A the end of the season, pick green tomatoes before the first frost and wrap in a single layer of newspaper and bring indoors to ripen.

Monday, February 8, 2010

Spinach is Good


When to Plant

The first planting can be made as soon as the soil is prepared in the spring. If the soil was prepared in the fall, seeds can be broadcast over frozen ground or snow cover in late winter and they will germinate as the soil thaws. Plant successive crops for several weeks after the initial sowing to keep the harvest going until hot weather. Seed spinach again in late summer for fall and early winter harvest. Chill seeds for summer or fall plantings in the refrigerator for 1 or 2 weeks before planting. In southern locations, immature spinach seedlings survive over winter on well-drained soils and resume growth in spring for early harvest. With mulch, borderline gardeners should be able to coax seedlings through the winter for an early spring harvest. Spinach can be grown in hotbeds, sunrooms or protected cold frames for winter salads.

Spacing & Depth

Sow 12 to 15 seeds per foot of row. Cover 1/2 inch deep. When the plants are one inch tall, thin to 2 to 4 inches apart. Closer spacing (no thinning) is satisfactory when the entire plants are to be harvested. The rows may be as close as 12 inches apart, depending upon the method used for keeping weeds down. In beds, plants may be thinned to stand 4 to 6 inches apart in all directions. Little cultivation is necessary.

Care

Spinach grows best with ample moisture and a fertile, well-drained soil. Under these conditions, no supplemental fertilizer is needed. If growth is slow or the plants are light green, side-dress with nitrogen fertilizer.

Harvesting

The plants may be harvested whenever the leaves are large enough to use (a rosette of at least five or six leaves). Late thinning may be harvested as whole plants and eaten. Cut the plants at or just below the soil surface. Spinach is of best quality if cut while young. Two or three separate seedlings of short rows can provide harvest over an extended period. Some gardeners prefer to pick the outer leaves when they are 3 inches long and allow the younger leaves to develop for later harvest. Harvest the entire remaining crop when seeds talk formation begins because leaves quickly deteriorate as flowering begins.

Thursday, February 4, 2010

Friday, January 29, 2010

Practice Your Survival Skills


The subject of survival is a big topic and the beginner, as well as the more experienced, may sometimes feel overwhelmed by the sheer volume of material that one can learn.

I always recommend frequenting the several excellent survival forums and message boards that are on the Internet. These are run by friendly experienced people well versed in the field of survival. Participants in these survival forums are skilled in everything from bushcraft to firecraft to handicraft. They take great pride and pleasure in helping anyone. Often the survival discussions are lively and informative. If you are interested in learning more about survival, you will be welcomed with open arms into the survival community.

In addition there are a number of excellent books and magazines that cover the topic of survival. The basic ways of surviving have not always changed much over hundreds of years, and very old outdoor survival books contain nuggets of wisdom that even modern day survivors can use.

But it is not enough to read survival books and visit online survival forums. You have to get out there and practice your survival skills and survival gear. Set up a lean-to, build a debris hut, build a fire, find water. Test your skills in a variety of conditions and with a variety of materials. Make sure you would be able to do these very same things while injured or when it is wet or cold or blazingly hot.

The more you learn about survival techniques the more you realize how much there is to learn. When faced with a large task it is often easier to break it down into bite sized chunks. Survival experts have found through experience that the foundation of survival rests on five basic survival skills. Master these 5 basic survival skills and you are well on your way to being an expert survivor yourself. I will post these 5 skills next.

So discuss, read, and practice. That is the way of becoming a survival expert.

Monday, January 25, 2010

Katadyn Pocket Water Filter


This is the most rugged, longest lasting microfilter available, This classic, robust water filter made of heavy duty materials is ideal for long lasting continuous use even under extreme circumstances. The silver impregnated ceramic element is effective against bacteria and protozoa. The Katadyn Pocket is the only water filter with a 20 year warranty.

• Effective against bacteria, protozoa, chemicals/toxins, and particlulate.
• Fast & easy to use.
• Ultracompact & lightweight - Weighs only 20oz.
• Filter cartridge treats up to 50,000 liters | 13,208 gal of drinking water.
• Trusted quality from the Katadyn Brand.